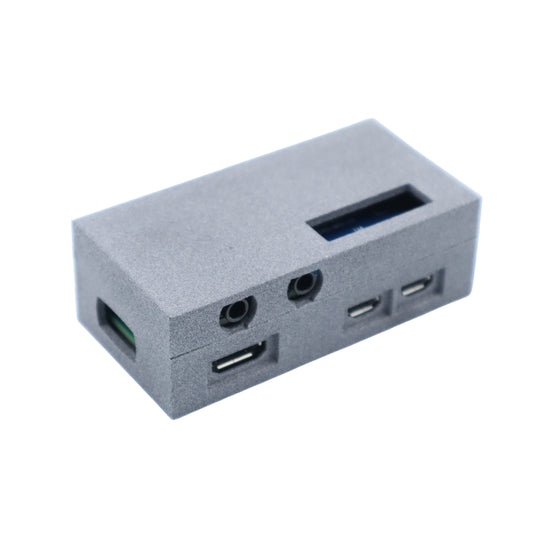
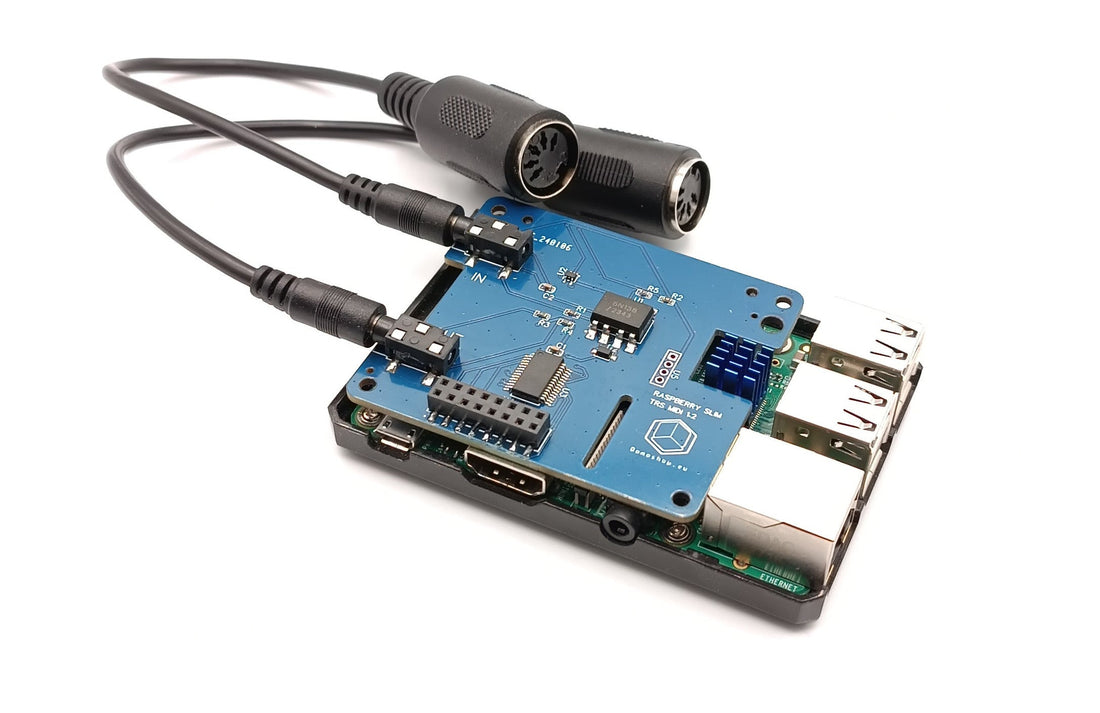
This article will show you how to properly configure the SLIM MIDI interface for your Raspberry PI3 or PI4. It is preferable that you already have a good experience with Raspberry and the Linux command line.
Configure the SLIM MIDI interface on your Raspberry PI 3/4
The instructions below were tested with Raspberry Pi OS / Debian versions 11 and 12. If you find problems please contact our support with the contact form. We will be pleased to assist you. (do not comment on this blog post, we don't often read the comments because of spam).
One important step in MIDI configuration on a Raspberry is to set the transmission speed of the serial port. MIDI connections are relatively slow compared to other digital communication protocols, such as USB or Ethernet. MIDI data is transmitted at a rate of 31.25 kilobits per second (kbps), which is equivalent to 3125 bytes per second. This speed is sufficient for transmitting the control signals and performance data typically used in music production, such as note on/off messages, pitch bend, and modulation, but it may not be sufficient for transmitting large amounts of audio or other data.
You have 2 ways to configure the serial port:
- by installing a .deb package that will install 'ttymidi' and take care of the Raspberry PI boot flags and options
- by running manually 'raspi-config', editing config.txt

Raspberry PI MIDI quick start with this deb package
This is the recommended setup method, since included scripts will properly configure boot options and kernel parameters.
Using the 'ttymidi' program will connect this MIDI serial port with the Alsa abstraction layer. Install this version of ttymidi from Github, since it's the only one that supports all MIDI messages like Sysex, Timings etc.
A package for the Raspberry PI OS version 11 or 12 can be downloaded here: ttymidi-rpi_0.20240907_armhf.deb
Install the package with 'sudo apt-get install ./ttymidi-rpi_0.20240907_armhf.deb',
It will setup the background ttymidi service, the boot files, etc, so no need to run the raspi-config command.
After this, reboot your Raspberry.
- Tip: the Github release section now contains also a ready-to-use Raspberry PI OS disk image to get you started quickly.
Manual configuration of the serial port
You won't need this step if you installed the deb package, with the 'quick start' instructions above.
First, you will have to make sure that no other software and the Linux console will interfere with our MIDI interface, since it uses the 2nd serial port (on a PI 3 or 4). This also applies to any Raspberry MIDI interface that use the native hat serial port, such as the Zynaptik Zynthian ones.
This can be done by using raspi-config:
- Start raspi-config:
sudo raspi-config.
- Select option 3 - Interface Options.
- Select option P6 - Serial Port.
- At the prompt Would you like a login shell to be accessible over serial? answer 'No'
- At the prompt Would you like the serial port hardware to be enabled? answer 'Yes'
- Exit raspi-config
Now we have to you should have access to the MIDI port with the /dev/serial0 device, but there is still one problem: MIDI uses a baud-rate of 31250 and, some programs can only communicate with a baud-rate of 38400, which is a 'Unix standard'.
So to enable a hack that will allow a 31250 baud communication to occur when 38400 bauds is selected, we have to modify /boot/config.txt.
- Type: sudo nano /boot/config.txt
- Search for the line
enable_uart=1
- Below, add
dtoverlay=miniuart-bt
dtoverlay=midi-uart0 - Type Ctrl-X and save
Reboot the Raspberry Pi for changes to take effect, and now you'll be ready to continue the configuration. Note that with this configuration onboard Bluetooth won't work anymore.
Warning! On some OS versions, enable_uart=1, seems to have a bad effect. If MIDI does not work with the test programs below, comment out 'enable_uart', reboot, and keep the two 'dtoverlay' lines.
Configure the Slim MIDI port for standard linux tools
If you prefer not to use the prebuild package, you will have to:
- setup the boot files as show above
- download the tool and compile it following the instruction on Github.
- Manually run ttymidi:
ttymidi -s /dev/serial0 -b 38400 -v
Now you can check the list of MIDI inputs and outputs of Alsa:
pi@raspberrypi:~ $ aconnect -l
client 0: 'System' [type=kernel]
    0 'Timer '
    1 'Announce '
client 14: 'Midi Through' [type=kernel]
    0 'Midi Through Port-0'
client 128: 'MIDI' [type=user,pid=909]
    0 'MIDI In '
    1 'MIDI Out '
Now you know that MIDI Out has a port number '128:1' and MIDI In '128:0'.
And you can try to play a MIDI file: aplaymidi -p 128:1 mario64.mid
Now, are you ready to take your music production skills to the next level? Dive into the world of MIDI programming with Python, a powerful language that can enhance your creative process and streamline your workflow.
Basic MIDI OUT connectivity check
To check that everything is ok, you can run this Python 3 test script:
#!/usr/bin/env python3

import serial
import time

ser = serial.Serial('/dev/serial0', baudrate=38400)
channel = 0 # this represents channel 1
note = 60 # C4
velocity = 85
note_off = 8
note_on = 9

while True:
  msg_note_on  = bytearray([(note_on << 4) | channel, note, velocity])
  msg_note_off = bytearray([(note_off << 4) | channel, note, velocity])
  print(str(hex(msg_note_on[0]))+' '+str(msg_note_on[1])+' '+str(msg_note_on[2]))
  ser.write(msg_note_on)
  time.sleep(0.5)
  ser.write(msg_note_off)
  time.sleep(0.5)
This script will play a C4 note one time per second, on the 1st MIDI channel.
If it does not work, it means:
- You did not follow the raspi-config procedure above
- Or did not add the dtoverlay line above
- Or you did not plug the right TRS-DIN Midi cable. Remember that it should be of Type B.
Note: if you replace 38400 with 31250 in the code above and it works, then you had a problem with the 'ddtoverlay' step.
Now if you want to do more than custom Python MIDI scripts and use many other Linux MIDI tools, you'll have to continue with the next step.
Basic Python MIDO example
Once you have 'ttymidi' set-up, you can try to program your own MIDI controller using the best Midi library for Python: MIDO. To install Mido, type:
$ sudo pip3 install mido python-rtmidi
Then a basic program that will print incoming MIDI and pass the messages to the out port will look like:
#!/usr/bin/env python3
import mido

inport = mido.open_input('MIDI In')
outport = mido.open_output('MIDI Out')
for msg in inport:
  print(msg)
  outport.send(msg)
Basic Python PY-MIDI example
This other example uses the py-midi library, which does not need a working 'ttymidi' program. You may need to install it with 'pip3 install py-midi'. This code prints what is received on MIDI IN, and if nothing is received during 1 second, it will output a Midi note on channel 1.
#!/usr/bin/env python3
import midi
import os

conn = midi.MidiConnector('/dev/serial0', baudrate=38400, timeout=1)

note = 70
channel = 0

while True:
  msg = None
  try:
    msg = conn.read()
  except TypeError:
    print("MIDI read error")

  if msg != None:
    print(msg)
  else:
    print("Sending note")
    n = midi.NoteOn(note, 100)
    conn.write(midi.Message(n, channel = channel))
    os.system('sleep 1')
    n = midi.NoteOff(note, 100)
    conn.write(midi.Message(n, channel = channel))
    note += 1
    if note > 90:
      note = 70
Here is an example of what you should see by running this script:
Message(NoteOn(57, 40), channel=3)
Message(NoteOff(57, 0), channel=3)
Message(NoteOn(65, 35), channel=3)
Message(NoteOff(65, 0), channel=3)
Message(NoteOn(67, 43), channel=3)
Message(NoteOff(67, 0), channel=3)
Message(NoteOn(69, 98), channel=3)
Message(NoteOff(69, 0), channel=3)
Sending note
Message(ControlChange(80, 7), channel=4)
Message(ControlChange(80, 14), channel=4)
Message(ControlChange(80, 17), channel=4)
Message(ControlChange(80, 18), channel=4)
Message(ControlChange(80, 19), channel=4)
Message(ControlChange(80, 20), channel=4)
Message(ControlChange(80, 21), channel=4)
Message(ControlChange(80, 25), channel=4)
Message(ControlChange(80, 30), channel=4)
Message(ControlChange(80, 34), channel=4)
Sending note
Sending note
Sending note
Slim MIDI plus onboard Bluetooth Configuration
Bluetooth plus MIDI is not a well tested solution, that may not work well in some situations. If you want to try anyway:
- In /boot/config.txt, remove:
dtoverlay=miniuart-bt
- And make sure you have
dtoverlay=midi-uart1
core_freq=250
core_freq_min=250What to do next?
Once you can get the MIDI repeater working, running the 'Basic Python MIDO example' above, it means that the board is running properly.
To continue your exploration of MIDI on Raspberry, I can recommend these links:
If you have any issues, contact our support via the Messenger icon below or through the email in your order receipt. Avoid comments under this blog post if it's urgent! Thank you!


8 comments
@Pedro
- For the I/O we recommend this CircuitPython tutorial: https://palmopensource.com/hardware/io-expander-on-raspberry-pi.php
- For Displays on SPI/i2c the best is to also use CircuitPython. They have all the drivers for lots of displays. Palmopensource has a tutorial on this also: https://palmopensource.com/hardware/oled-displays-raspberry-pi-and-python.php
ttymidi-sysex works for the Pi4B with latest OS linux-image-12.25+rtp-rpi-2712 – can do an apt search raspberry and search for it, then upgrade. Remove serial in cmdline.txt, add dtoverlay=disable-bt in config.txt ; raspi-config disable shell and enable serial will add the enable_uart=1 automatically. Add dtparam=uart0
dtoverlay=uart-midi0. Now, before installing ttymidi, Confirm that the pins have become UART0 pins, and that the tty device exists: pinctrl 14-15 must return TXD0,RXD0 and ls -l /dev/ttyAMA0 – present. Now install ttymidi-sysex, run the pool script and monitor TX with pinctrl poll 14 &.
I got Midi Out!! Big thanks to Ludo and its crew @Domo for the assistance even on rpi forums!
Hi, are there any examples or documentation on how to use the Additional 16 pins I/O connector and 4 SPI ports to solder an OLED screen or any other SPI device?
That’s normal aseqdump shows only Midi IN ports, aconnect will show all ports. When using Ttymidi as an Alsa client in other software, make sure to reference ‘128:0’ for MIDI In and ‘128:1’ for MIDI Out.
Why can’t I see the midi output port when running aseqdump -l ??
jrice@midibox:~ $ aconnect -l
client 0: ‘System’ [type=kernel]
0 ‘Timer ’
Connecting To: 143:0
1 ’Announce ’
Connecting To: 143:0
client 14: ’Midi Through’ [type=kernel]
0 ‘Midi Through Port-0’
client 128: ‘MIDI’ [type=user,pid=494]
0 ‘MIDI In ’
1 ’MIDI Out ’
client 143: ’PipeWire-System’ [type=user,pid=726]
0 ‘input ’
Connected From: 0:1, 0:0
client 144: ’PipeWire-RT-Event’ [type=user,pid=726]
0 ’input ’
jrice@midibox:~ $ aseqdump -l
Port Client name Port name
0:0 System Timer
0:1 System Announce
14:0 Midi Through Midi Through Port-0
128:0 MIDI MIDI In
jrice@midibox:~ $