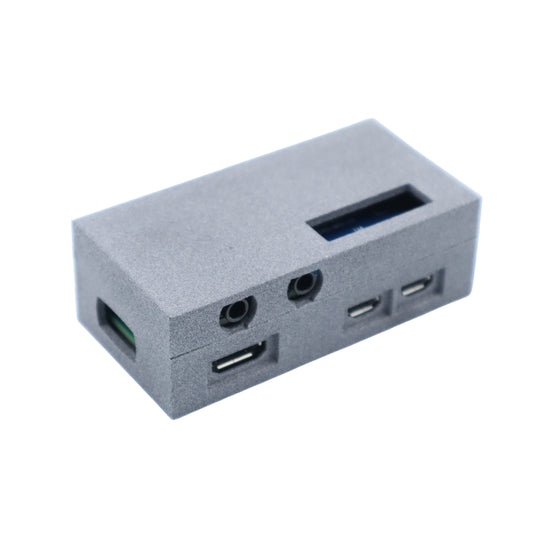
Below, you'll find comprehensive technical specifications outlining our Slim MIDI interfaces tailored specifically for Raspberry Pi. Accompanying these details is a thorough description of the connectivity options at your disposal, empowering you to make informed decisions about what can be done with the Slim MIDI interfaces.
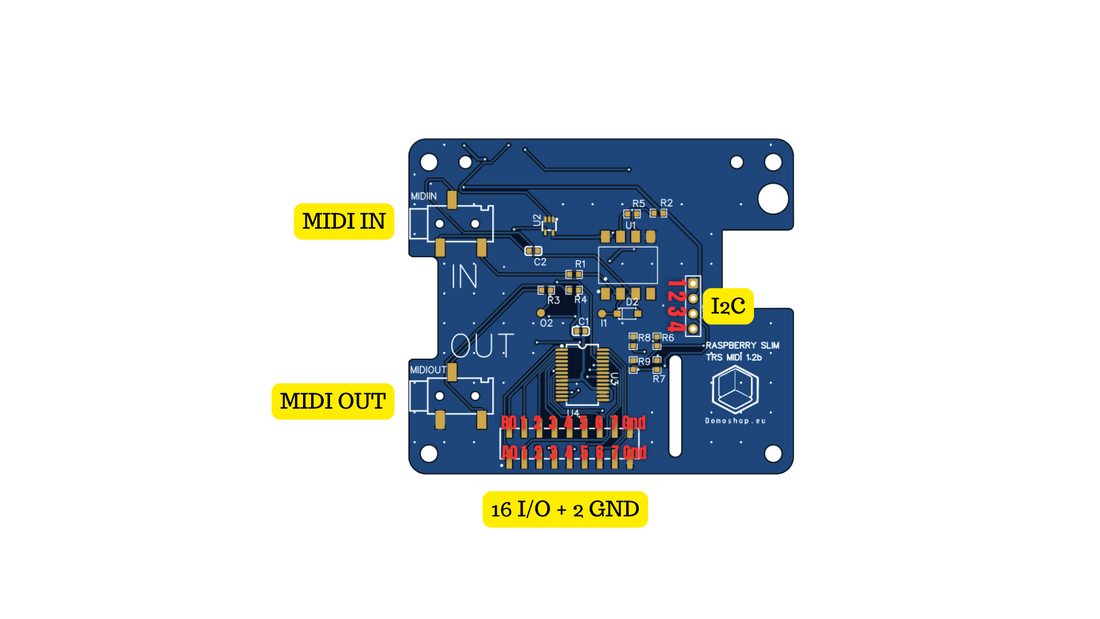
MIDI IN and MIDI OUT mini jack connectors
These connectors follow the standard mini jack MIDI Type-B specifications, and are designed to operate at a buffered 5 volts, for maximum compatibility across various devices and setups.
They are connected to the Raspberry RX/TX UART0 pins (8 and 10) so that you can use them with the Linux standard serial port libraries. You should also run ttymidi-sysex to add Alsa compatibility. For a quick and clean configuration of serial midi and maximum compatibility with MIDI standards , use ldrolez ttymidi-sysex packages.
- TX pin 8
- RX pin 10

18 I/O headers
If you’re using the SLIM MIDI Hat version 1.2 or higher, it comes equipped with 16 pins connected to an MCP23017 chip, plus 2 pins connected to Ground on the right side. This chip greatly enhances the Hat’s functionality by adding 16 flexible Input/Output (I/O) pins, which can be configured as either inputs or outputs to suit your needs.
Each pin can handle a maximum voltage of 5 volts.
As shown in the photo above:
- The outer row of pins connects to Port A, while the inner row connects to Port B.
- The chip's I2C address is 0x21.
- The Raspberry Pi uses Pin 3 (SDA) and Pin 5 (SCL) for I2C communication.
Using the Interrupt Mode:
- INTA is connected to Pin 36 (GPIO16) on the Raspberry Pi.
- INTB is connected to Pin 37 (GPIO26) on the Raspberry Pi.
Programming Information:
- Connecting a rotary encoder to the MCP23017 using Circuit Python
- In Circuit Python + Blinka for the Raspberry: https://learn.adafruit.com/using-mcp23008-mcp23017-with-circuitpython/overview
- The MCP23017 Python library: https://github.com/sensorberg/MCP23017-python
- Some Zynthian boards use the same chip
Please take note:
- Board version 1.1: The MCP23017 chip is not pre-soldered. If you have the right equipment and good soldering skills, you can manually add the chip to the board.
- Board version 1.2: The board has a 16-pin I/O connector instead of 18 pins. The 2 Ground pins are not present. But you can find a Ground on the I2C connector.
- Board version 1.2b, 1.3. 1.3a: 18 pins I/O connector.
I2C pins
If you possess a MIDI Hat version 1.2 or higher, you'll find that the 4 pins are linked to the Raspberry Pi's I2C port. This bus is shared with the MCP23017 GPIO chip.
Pins description:
- 1.GND
- 2.+3.3v
- 3.SCK (Pin 5 on Raspberry PI header)
- 4.SDA (Pin 3 on Raspberry PI header)
You can solder an OLED screen on these terminals or any other I2C device:
- Python + OLED screen: https://pypi.org/project/Adafruit-SSD1306/
Configuration and Python programming
Explore our informative article for detailed instructions on configuring the MIDI serial port and delve into a variety of Python MIDI programming examples.
Should you have any further inquiries or require clarification, don't hesitate to drop us a comment or message. We're here to assist!